How to Add Validation to Your Form
Add server-side validation to any form — required fields, email and format checks, length and value limits — with no backend. fetch() gets per-field errors.
The ShipMyForm team
· 3 min read
Every public form eventually receives junk: an empty message, an email that is
just jane@, a phone number that is three digits. You can catch some of it in
the browser with required and type="email", but those checks only run in the
browser — anything that posts straight to your endpoint (a script, a bot, a
request with JavaScript off) sails right past them.
Real validation has to happen on the server. With ShipMyForm you don't write or host one: you add rules to your form in the dashboard, and every submission is checked before it is stored, counted, or forwarded. This guide walks through it end to end, including how to show a message next to each field.
Step 1: add rules in your dashboard
Open your form, go to Settings, and find the Validation rules section.
Add a rule for each field you want to check — the field name must match your
input's name attribute. For each rule you can set a type (email, URL, number,
or phone), mark it required, and set length limits. The Advanced link adds a
regex pattern, numeric min/max, and a custom error message.
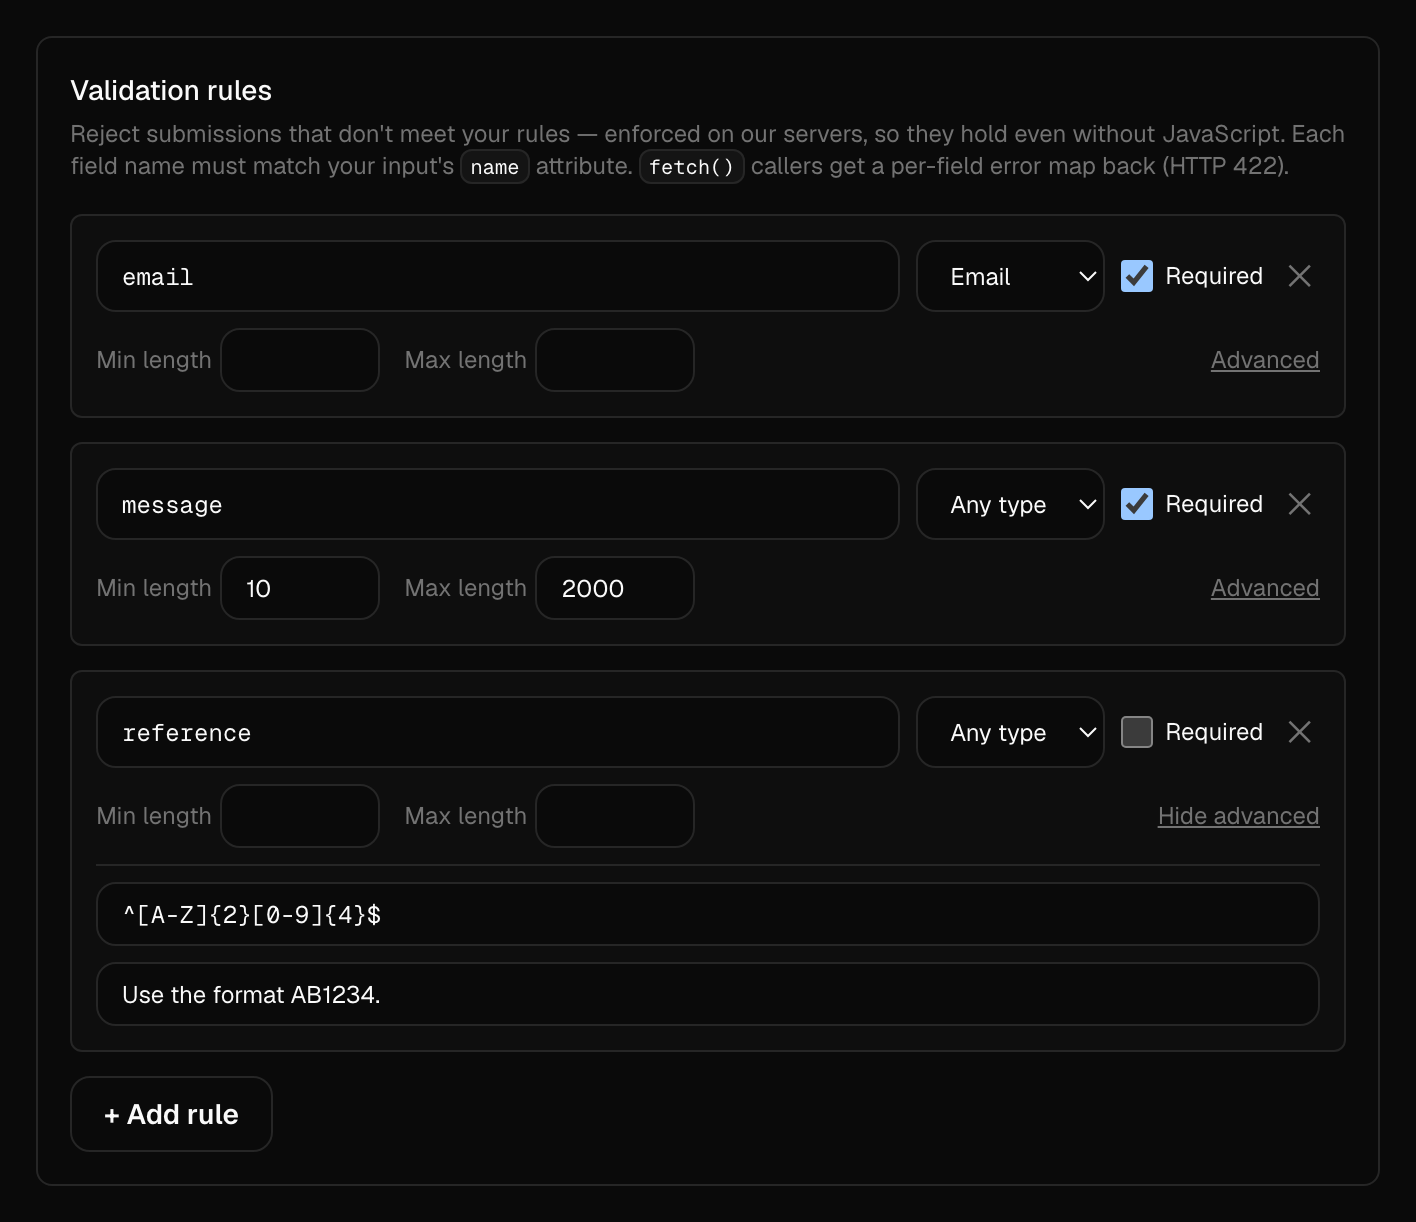
Here we require a valid email, a message of at least 10 characters, and a
reference that matches a regex with a friendly custom message. Save, and the
rules take effect immediately.
What you can check
| Rule | What it enforces |
|---|---|
| Required | The field must be present and non-empty. |
| Type | Email, URL, number, or phone. |
| Min / max length | Character-count bounds for text. |
| Min / max value | Numeric bounds (for a number type). |
| Pattern | A regular expression the value must match. |
| Custom message | Your own wording for that field's error. |
A rule with a type or a length limit but not marked required only runs when the field has a value. Leave an optional field blank and it passes; fill it in and it has to be valid.
Step 2 (optional): show errors next to each field
Rules alone already protect your inbox — an invalid submission is rejected
server-side no matter what. But if you submit with JavaScript, you can turn those
rejections into inline messages. Send the header Accept: application/json and,
on a 422 response, read the fields object and render each message beside the
matching input.
const form = document.querySelector("#contact");

form.addEventListener("submit", async (e) => {
  e.preventDefault();
  clearErrors(form);

  const res = await fetch("https://shipmyform.com/f/YOUR_FORM_ID", {
    method: "POST",
    headers: { Accept: "application/json" },
    body: new FormData(form),
  });
  const data = await res.json();

  if (res.status === 422 && data.error === "validation") {
    for (const [name, message] of Object.entries(data.fields)) {
      showFieldError(form, name, message); // your render helper
    }
    return;
  }

  if (data.ok) {
    form.reset();
    showSuccess();
  }
});
The result is exactly what your visitors expect — a clear message under the field that needs fixing, with no page reload and no backend of your own:
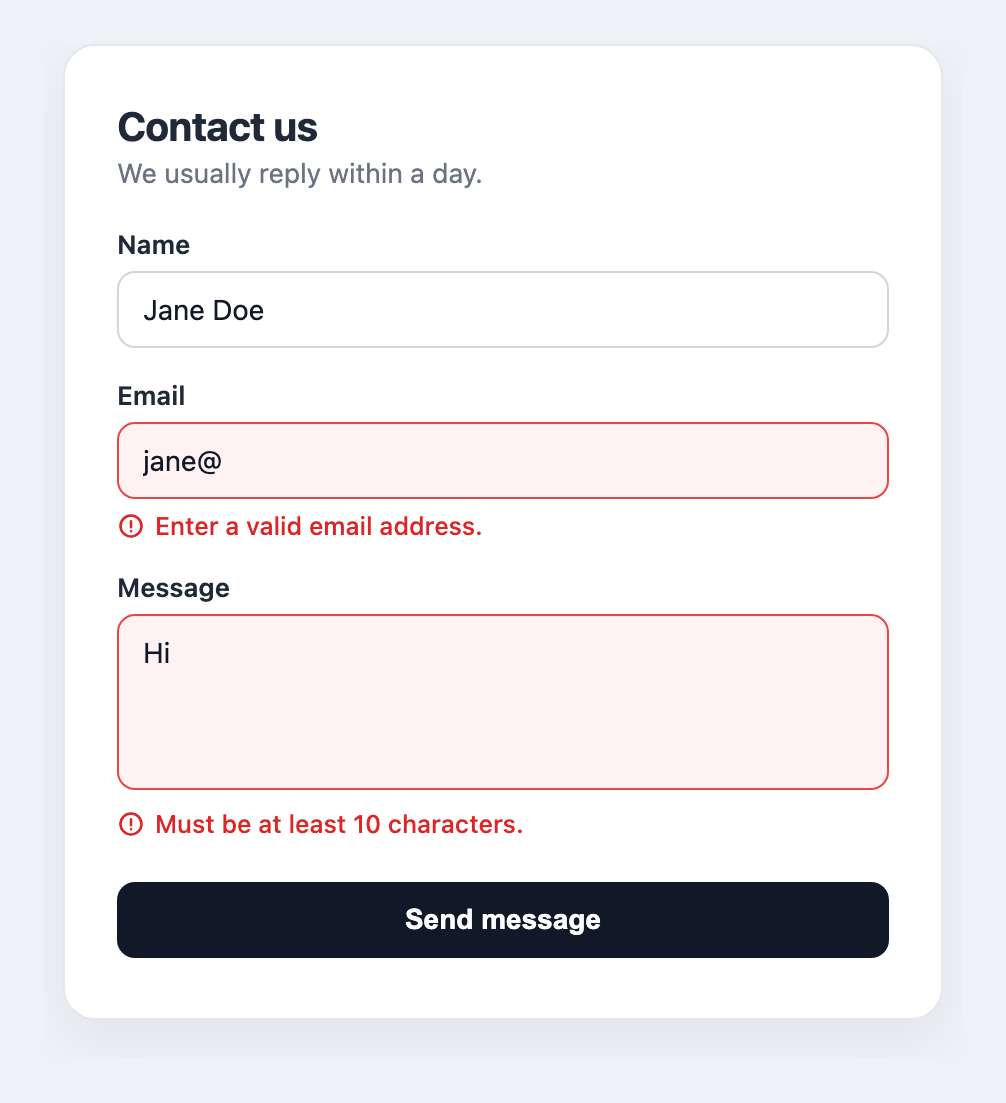
The 422 response
error is always "validation", and fields contains only the fields that
failed — each mapped to its message (your custom text when you set one).
{
  "ok": false,
  "error": "validation",
  "message": "Some fields need attention.",
  "fields": {
    "email": "Enter a valid email address.",
    "message": "Must be at least 10 characters."
  }
}A normal browser form post can't receive a JSON body, so an invalid submission
is redirected to a hosted error page that asks the visitor to go back and fix
their entries. For inline, field-level errors, use the fetch()
approach above.
Where validation sits in the pipeline
Validation runs early, right after spam filtering and before anything durable happens. So a submission that fails your rules is never stored in your inbox, never counted against your monthly quota, and never delivered to a connector. Your data stays clean and your quota only reflects real submissions.
Next steps
- New here? Start with what a form backend actually is.
- Wiring it in React or Next.js? See Next.js form handling.
- Read the validation reference in the docs for the full rule and response details.
- Start free — validation is on every plan, with 100 submissions a month and no card required.
Frequently asked questions
- Is form validation free?
- Yes. Server-side validation is included on every ShipMyForm plan, including the free plan. Add rules to any form in its settings.
- Doesn't the browser already validate with required and type=email?
- Those attributes only run in the browser and are trivially bypassed by anything that posts directly to your endpoint — a script, a bot, or a request with JavaScript disabled. Server-side rules run on every submission regardless of the client, so they are the real gate. Keep the HTML attributes for instant feedback and add server rules behind them.
- What happens when a submission fails validation?
- It is rejected before it is stored, counted against your quota, or sent to any connector. A fetch()/XHR caller receives HTTP 422 with a per-field error map; a plain browser form is redirected to a hosted error page.
- How do I show the errors next to each field?
- Submit with the header Accept: application/json. On a 422 response, read the fields object — field name to message — and render each message beside the matching input. There is a full code example in this guide.
Related guides
How to Handle Form Submissions in Next.js
Three ways to handle a Next.js form — Server Actions, Route Handlers, or a form backend — with code for each and a clear rule for choosing.
How to Stop Contact Form Spam Without reCAPTCHA
Honeypots, rate limiting, and Turnstile — layered spam defenses that beat reCAPTCHA without the puzzles.
What Is a Form Backend? (And When You Need One)
The plain-language definition, how form endpoints work, and when a hosted backend beats rolling your own.